Full custom HTML page with GoatCounter
Create standalone HTML pages in Jekyll with custom CSS/JS while preserving GoatCounter analytics tracking.
Why create a custom HTML page?
Most Jekyll pages in the Chirpy theme use the theme’s built-in layouts and styles. Sometimes, you may want a stand-alone page that:
- Uses your own HTML, CSS, and JavaScript without being wrapped in the theme.
- Looks and behaves completely differently from the rest of your blog.
- Hosts small apps, experiments, or tools (like a calculator, flashcards, or quiz).
- Still tracks visitors using the same GoatCounter analytics as the rest of the site.
For this, we can make a full HTML page with layout: null and integrate GoatCounter manually.
1) Create your HTML file
You can store the file anywhere that’s not in an underscored folder (e.g. _layouts, _includes, _posts).
For example:
1

custom-pages/app-name.html
or
1

app-name.html
2) Add the front matter
This tells Jekyll:
-
layout: null→ Don’t wrap the page in Chirpy’s layout (we’re writing full HTML ourselves). -
permalink:→ Control the published URL (independent of file location).
At the very top of your file:
1
2
3
4
5

---
title: My Custom App
layout: null
permalink: /app-name/
---
Result: This page will be published at:
1

https://yourdomain.com/app-name/
3) Add GoatCounter includes
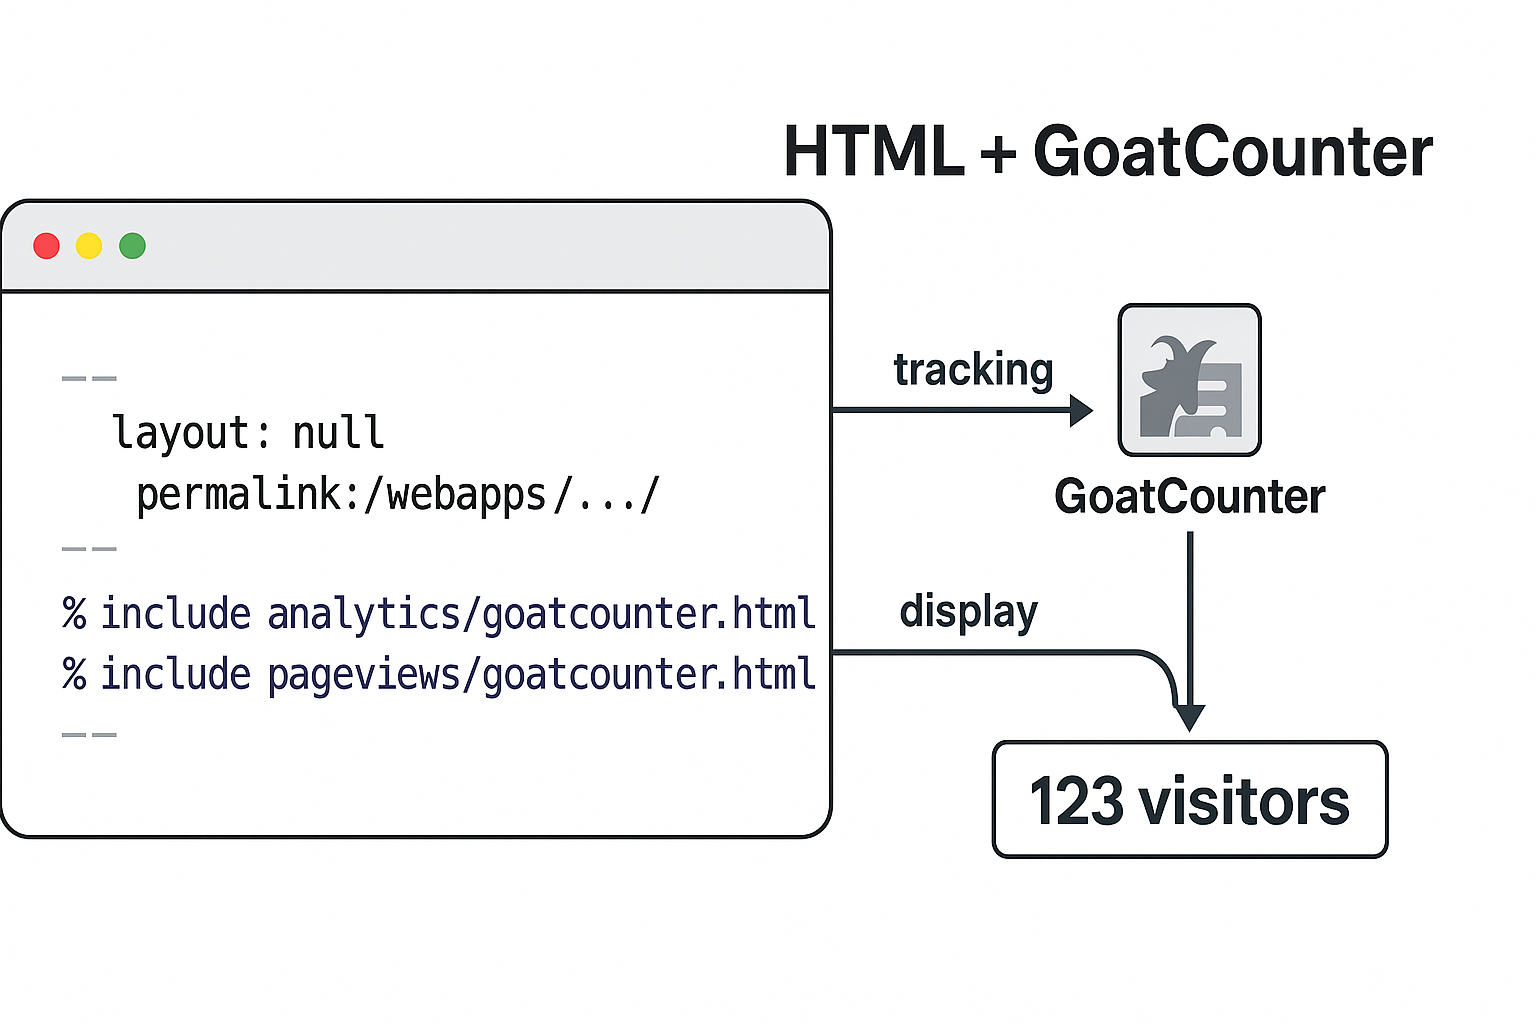
GoatCounter needs two parts:
- Tracking script – sends the pageview hit.
- Display script – fetches and shows the count in your page.
4) Add a simple “XX visitors” block
We’ll make this non-localized and style it inline so it doesn’t depend on Chirpy’s CSS.
1
2
3
4
5
6
7

<div style="font-size: 0.9rem; color: #ffffff; margin-bottom: 1rem;">
  <span>
    <em id="pageviews" style="font-style: normal; font-weight: bold; color: #ffffff;">
      Loading…
    </em> visitors
  </span>
</div>
5) Full example page
Here’s a working template you can copy–paste into your file, then replace the placeholder CSS/HTML/JS with your own.
1
2
3
4
5
6
7
8
9
10
11
12
13
14
15
16
17
18
19
20
21
22
23
24
25
26
27
28
29
30
31
32
33
34
35
36
37
38
39
40
41
42
43
44
45
46
47
48
49
50
51
52
53
54
55

---
title: My Custom App
layout: null
permalink: /webapps/app-name/
---

<!DOCTYPE html>
<html lang="en">
<head>
  <meta charset="utf-8" />
  <meta name="viewport" content="width=device-width, initial-scale=1" />
  <title>Full custom HTML page with GoatCounter</title>
  <meta name="theme-color" content="#6c5ce7" />

  <!-- Your CSS -->
  <style>
    /* Your custom styles here */
  </style>

  <!-- GoatCounter tracking (sends the hit) -->

  {% include analytics/goatcounter.html %}

</head>
<body>
  <main class="container">

    <!-- Visitors counter UI -->
    <div style="font-size: 0.9rem; color: #111111; margin-top: 1rem;">
      <span>
        <em id="pageviews" style="font-style: normal; font-weight: bold; color: #111111;">
          Loading…
        </em> visitors
      </span>
    </div>

    <!-- Your custom HTML content -->

    <h1>{{ page.title }}</h1>

    <p>This is my custom HTML app.</p>

  </main>

  <!-- Your JavaScript -->
  <script>
    // Your custom JS here
  </script>

  <!-- GoatCounter display (fetches & fills #pageviews) -->

  {% include pageviews/goatcounter.html %}

</body>
</html>
6) Make sure GoatCounter is set in _config.yml
You already have this, but for completeness:
1
2
3
4
5
6

pageviews:
  provider: goatcounter

analytics:
  goatcounter:
    id: your-goatcounter-id   # e.g. "linsnotes" for linsnotes.goatcounter.com
7) Test locally
Run:
1

bundle exec jekyll serve
Visit:
1

http://localhost:4000/app-name/
You should see:
- “Loading…” in the visitors block.
- After a short delay, it changes to a number from GoatCounter.
💡 Key takeaway: The permalink controls your page’s public URL — not the file’s location. You can keep your custom pages neatly organized anywhere in your repo.